Crafting extended AI-generated videos might appear challenging at first, yet with Pika Labs, it’s surprisingly simple. This guide aims to streamline your journey, showing you how to significantly lengthen the runtime of your AI videos and animations, well past the standard 3-second limit.
Understanding the Limitations of AI Video Duration
Typically, AI systems like Pika Labs, Genmo, and Moon Valley produce videos that are brief, usually lasting only a few seconds. This brevity is largely due to the current stage of AI technology, which is still in a phase of rapid development and improvement. For content creators, this presents a significant challenge. Whether it’s for digital marketing, storytelling, or creating engaging content for social media, the need for longer videos is paramount.
Why AI Videos Are Short
The reason behind these short durations lies in the computational and algorithmic limitations of current AI technologies. Processing longer videos requires more advanced algorithms and greater computational power, which are areas still under development.
The Impact on Content Creators
For those in digital marketing, filmmaking, or any field requiring video content, these limitations can be frustrating. Short videos might not convey the complete message or story, limiting the creator’s ability to engage with their audience effectively. Longer videos allow for more detailed storytelling, more comprehensive information dissemination, and a greater capacity for creative expression.
Evolving AI Technology
It’s important to recognize that AI video generation technology is continuously evolving. As AI becomes more sophisticated, we can expect these duration limitations to lessen. However, until that happens, content creators need practical solutions to overcome these challenges.
In the following sections, we’ll explore a unique workaround using Pika Labs that can help extend your AI-generated videos to meet your content needs. This method provides a bridge over current technological limitations, enabling creators to produce longer, more impactful AI videos.
If you’re new to Pika Labs, it’s recommended to first read basic tutorials: Pika Labs AI Video Generator Review & How to Use Pika 1.0.
Step 1: Generating the Base Video
Creating a longer AI video begins with generating a base video. This foundational step is crucial as it sets the tone and style for your entire project. Here’s how to get started with Pika Labs:
Visiting Pika Labs and Joining the Discord Community
- Navigate to Pika Labs: The first step involves going to the Pika Labs website. This is where you’ll find resources and links to their AI video generation tools.
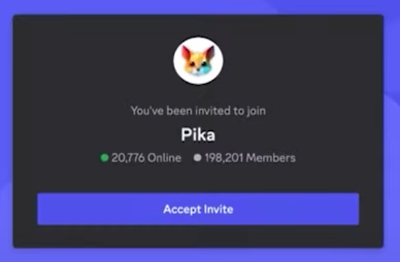
- Join Their Discord Server: Pika Labs operates through a Discord server, providing a community-driven platform. Joining this server is essential as it’s where you’ll execute commands to generate your videos. 🌟Invite link: https://discord.gg/pika
Executing Commands in Discord
- Enter a Discord Room: Once you’re in the Pika Labs Discord server, find a suitable room where you can execute your commands. These rooms are designed for users to interact with the AI and create videos.
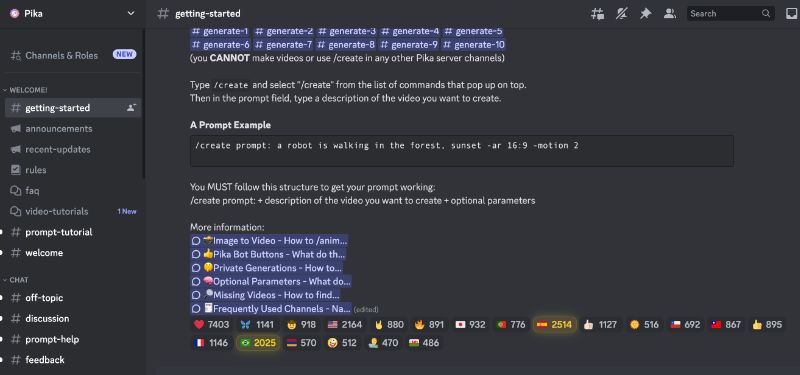
- Use the
SLC createCommand: In the Discord room, type in the commandSLC create. This command initiates the video creation process. It’s like telling the AI, “Hey, let’s start making a video.”

Setting Up Your Video Parameters
- Configure Camera Parameters: After executing the command, you’ll need to set various camera parameters. This includes frame rate, aspect ratio, and motion settings. These parameters dictate how your video looks and feels. Think of it as setting up a virtual camera for your AI director.
Uploading the Base Image
- Choose Your Base Image: The base image is the cornerstone of your video. It’s the starting point from which the AI will generate the animation. Select an image that aligns with your video’s theme or narrative.

- Wait for the AI to Generate the Video: Once you upload your image and set the parameters, the AI starts working on your initial video. This process might take a few minutes, so be patient. The AI is crafting the first few seconds of your story.

This first step is all about laying the groundwork for your extended AI video. By carefully selecting your base image and setting the right parameters, you ensure that the video starts off on the right foot, setting the stage for the subsequent steps where you’ll extend its length.
Step 2: Extending the Video
Once you have your base video from Pika Labs, the next phase is to extend its duration. This step requires a bit of creativity and some basic video editing skills. Here’s how to do it:
Downloading and Opening Your Video in Editing Software
- Download the Video: After your initial video is generated by Pika Labs, download it to your computer. This is your starting point for the extension process.
- Choose Your Editing Software: Open the downloaded video in a video editing program. You can use Adobe Premiere Pro, Final Cut Pro, DaVinci Resolve, or any other software you’re comfortable with.
Exporting the Last Frame as an Image
- Find the Last Frame: In your video editing software, scrub through the timeline to locate the very last frame of your video. This frame is crucial as it will serve as the link between your existing video and the extended part.
- Export the Frame as an Image: Once you’ve found the last frame, export it as a still image. Most video editing software allows you to save a frame as a JPEG or PNG file. This image will be used to create the next segment of your video.

Generating the Next Video Segment
- Re-Upload to Pika Labs: Now, take the image you just exported and upload it back to Pika Labs through their Discord server, just like you did with the base image.
- Create the Next Video Segment: Use the same or similar parameters as you did for the initial video. This ensures consistency in the video’s style and motion. The AI will now generate a new video segment starting from this image.

By repeating these steps, you can gradually build a longer video, piece by piece. Each segment connects seamlessly to the next, creating a smooth, extended animation or video. This method effectively circumvents the inherent limitations of AI-generated video lengths, allowing you to craft content that’s not just engaging but also adequately long for your needs.
Step 3: Assembling the Extended Video
After generating the additional video segments, the key task is to assemble them into a single, coherent video. This step involves precision and a good eye for detail to ensure a smooth transition between segments. Here’s how to proceed:
Importing and Aligning Video Segments
- Import New Video Segments: Open your video editing software and import the new video segments you’ve generated using Pika Labs.
- Align with the First Segment: Place the new segment on the timeline right after the first segment. Carefully align them so that the transition from one segment to the next is as seamless as possible. This might require fine-tuning the placement to ensure there are no jumps or abrupt changes.

Ensuring Seamless Transitions
- Check for Continuity: Play the transition point between segments to ensure the continuity is maintained. You don’t want your audience to notice where one segment ends and the next begins.
- Adjust if Necessary: If you notice any discrepancies, you may need to make slight adjustments. This could involve trimming frames or using transition effects to smooth out any noticeable jumps.
Repeating the Process
- Continue Adding Segments: Once you’re satisfied with the transition, continue adding more segments following the same process. Each new segment extends the overall length of your video.
- Review Regularly: Periodically review the entire video to ensure that it maintains a consistent flow. It’s important that the extended video feels like a single, unified piece rather than a series of stitched-together clips.
Tips for a Polished Video
- Maintain Consistency: Ensure that all segments have a consistent look and feel in terms of color, lighting, and motion.
- Use Transitions Wisely: If transitions are necessary, use them sparingly and choose styles that complement the video’s aesthetic.
By meticulously assembling and refining each segment, you create a longer, cohesive AI-generated video that holds the viewer’s attention and conveys your message effectively.
Step 4: Final Touches and Export
With your extended AI video now assembled, the final stage involves adding the finishing touches and exporting the video for use. This step is crucial as it ensures your video is polished and presented in the best possible quality.
Adding Final Touches
- Review the Entire Video: Before exporting, watch the entire video from start to finish. Look out for any inconsistencies in transitions, audio, or visual effects.
- Adjust Audio and Visuals: If your video includes audio, ensure it’s well-synced with the visuals. Adjust levels and add any necessary sound effects or background music.
- Color Correction and Grading: Apply color correction and grading to give your video a consistent and professional look. This step can significantly enhance the visual appeal of your AI-generated content.
- Add Titles and Credits: If needed, insert opening titles, closing credits, or any text overlays. Ensure these are legible and stylistically in line with the video.
Exporting Your Video
- Choose the Right Format: Select a format that suits your distribution channel. Formats like MP4 (H.264) are widely used for their compatibility with various platforms.
- Set Quality Parameters: Choose the resolution and bitrate that reflect a balance between quality and file size. Higher resolutions and bitrates offer better quality but result in larger files.
- Export the Video: Once you’re satisfied with all settings, export your video. Depending on the video’s length and quality settings, this process might take some time.

Ready for Use
- Your Extended AI Video is Ready: After exporting, your video is ready to be shared, uploaded, or integrated into your projects. Whether it’s for marketing, storytelling, or educational purposes, your extended AI video is now a polished piece of content.
This step completes the process of creating a longer AI-generated video using Pika Labs. By following these steps, you’ve successfully navigated the challenges of AI video duration limitations, resulting in a video that’s tailored to your specific needs and creative vision.
Final Thoughts
As we wrap up this journey into the realm of creating longer AI videos using Pika Labs, it’s essential to remember that innovation and creativity know no bounds. With the techniques shared in this guide, you’ve gained the power to break free from the limitations of short AI videos.
In the ever-evolving landscape of digital content creation, adaptability is key. Embrace these methods to craft videos that not only engage your audience but also convey your message with depth and impact.
Keep exploring, keep experimenting, and stay curious. The world of AI content creation is full of exciting possibilities waiting to be explored. Share your creations, collaborate with fellow creators, and continue pushing the boundaries of what AI can achieve.